I. Introduction
Tie dyeing is a fun and popular activity that has been around for decades. It offers a unique way to express your individuality and create one-of-a-kind designs. This article aims to provide a comprehensive guide on how to tie dye a shirt, including tips on materials and preparation, step-by-step instructions, creative patterns and designs, outfit ideas, eco-friendly alternatives, and troubleshooting tips.
II. Materials and Preparation
To successfully tie dye a shirt, you will need the following materials: a shirt made of 100% cotton or other natural fibers, fabric dye, salt, rubber bands or string, gloves, measuring cup, squirt bottle, plastic wrap, and a large plastic bag. Before starting the tie dyeing process, it’s crucial to prepare your workspace, which should be a flat surface covered with plastic to prevent dye from staining it. Your shirt should also be washed and dried beforehand, without any fabric softener or dryer sheets, to ensure that the dye will adhere properly.
III. Step-by-Step Guide
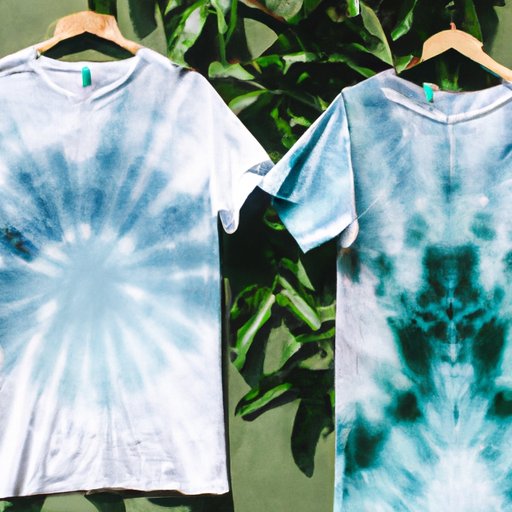
There are several popular methods for tying and dyeing a shirt, including the spiral, bullseye, and crumple techniques. To achieve the spiral pattern, pinch the center of the shirt and start twisting it into a spiral until it resembles a cinnamon roll. Tie rubber bands around the roll to create pie-shaped sections to be dyed. With the bullseye method, create a small fold in the center of the shirt and place a rubber band around it. Continue making folds and adding rubber bands to create different sections. Crumpling involves simply scrunching up the shirt in random bunches and securing it with rubber bands. Once your shirt is tied, prepare your dye according to the package instructions, and begin applying it to your shirt with a squirt bottle. Cover the shirt with plastic wrap and allow it to sit for a few hours or overnight. Rinse the shirt in cold water until the water runs clear, remove the rubber bands, and then wash the shirt separately in cold water and mild detergent.
IV. Creative Patterns
Tie dyeing offers endless possibilities for creating unique, eye-catching designs. The crumple method, where you randomly scrunch up the shirt and secure it with rubber bands, creates a diamond-like pattern that looks great in multiple colors. The accordion fold involves folding the shirt widthwise, then folding it again lengthwise, and adding rubber bands down the length of the shirt. The resulting pattern is comprised of repeating zig-zags. To achieve the heart or star pattern, pinch the fabric at the center of the shirt and fold it in half, then cut out the shape on the folded area before tying and dyeing.
V. Outfit Ideas
A tie-dye shirt is a versatile addition to any wardrobe. Pair it with denim cutoffs and sandals for a laid-back summer look, or dress it up with a maxi skirt and wedges for a boho chic look. To accessorize, try adding a statement necklace or earrings, a floppy hat, or a fringed bag. Play around with different combinations until you find a style that suits you.
VI. Getting Inspired
Tie dyeing isn’t just about following a set of instructions – it’s also an opportunity to get creative and make something uniquely your own. Check out social media platforms like Instagram or Pinterest for tie dyeing inspiration and ideas. You can also meet other tie-dye enthusiasts at workshops or fairs, or even start a tie-dyeing group with friends or family.
VII. Eco-Friendly Alternatives
Some commercial dyes may contain harmful chemicals that aren’t great for the environment or for your health. If you’re concerned about this, there are several eco-friendly alternatives that you can use. Natural dyes like turmeric, beetroot, or avocado create beautiful colors and are safe to use, both for you and for the environment. Another option is to use low-impact dyes that are made from synthetic materials but are certified as environmentally friendly.
VIII. Troubleshooting Tips
Not every tie-dyeing attempt yields a perfect shirt. If you’re unhappy with the results, don’t worry – there are ways to fix it. If your shirt’s colors are uneven, try refolding it and adding more dye to the lighter areas. If your shirt’s design is too faint, try soaking it in the dye for a longer period of time or reapplying the dye after letting it dry.
IX. Conclusion
Tie-dyeing a shirt is a fun, creative activity that allows you to express your individuality and make something unique. By following the materials and preparation tips, step-by-step instructions, and pattern ideas provided in this guide, you can create your own tie-dye masterpiece. And if you’re looking to be more eco-friendly, there are plenty of natural and low-impact dye alternatives available.
