Introduction
Smoke can be a challenging subject to draw, but with the right techniques and tools, anyone can create a convincing and realistic effect. In this article, we’ll walk you through how to draw smoke, step by step, and offer tips and advice to help bring your drawings to life.
Step-by-Step Guide
Start with the basics. When drawing smoke, it’s important to create wispy, ethereal shapes that convey the lightness and transparency of the substance. Begin by sketching the basic shape of the smoke using light, feathery lines. Remember that smoke does not have defined edges, so keep your lines loose and flowing.
To create a more realistic effect, focus on shading and creating texture. Use your pencil to gradually build up the density of the smoke, starting with lighter tones and gradually building up to darker shades. Experiment with different types of lines and strokes to create texture and variation in your shading.
Remember to pay attention to the direction of the smoke, as well as its overall shape. Use your shading techniques to create the illusion of depth and dimension, and to convey movement and flow.
Using Reference Images
One of the most effective ways to improve your smoke-drawing skills is to use reference images. This will help you understand the unique shapes and movements of smoke in different situations, and give you a solid foundation for creating your own drawings.
There are many online resources that offer high-quality smoke photographs and drawings, as well as books and magazines that feature smoke as a subject. Look for images that capture the mood and atmosphere you want to convey in your own drawings, and take note of the details that make each image unique.
Experimenting with Mediums
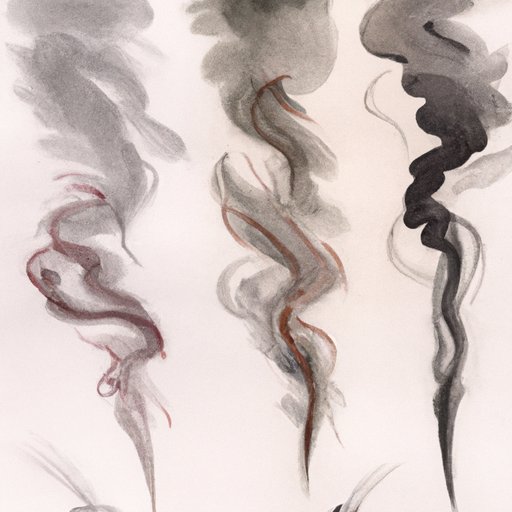
Charcoal, graphite, and watercolor are all popular mediums for drawing smoke. Each has its own unique properties that can be used to create different effects. Charcoal, for example, is ideal for creating soft, smudged edges and deep, rich tones. Graphite is great for creating fine, delicate lines, while watercolor can be used to create more ethereal, transparent effects.
Experiment with different mediums to find the one that best suits your style and needs. Don’t be afraid to combine different mediums in your drawings, either. For example, you might use charcoal to create the base layer of your drawing, and then add watercolor or graphite accents to create greater depth and dimension.
Understanding Light and Shadow
Light and shadow play a critical role in creating convincing smoke effects. To create a realistic smoke drawing, you need to pay close attention to how light interacts with the smoke, and use your shading techniques to create the illusion of depth and dimension.
Look at reference images or observe smoke in real life to get a sense of how light creates highlights and shadows on the surface of the smoke. Use your shading techniques to create dark areas where the smoke is thickest, and lighter areas where it is more transparent.
A Case Study
One of the most effective ways to enhance your smoke-drawing skills is to study existing drawings that feature smoke effects. Analyze the composition, line work, and shading techniques used in the drawing, and try to replicate these techniques in your own work.
Experiment with different techniques, such as using a kneaded eraser to create highlights on the smoke or using a smudging tool to blend different shades together. Focus on creating a sense of depth and dimension in your drawing, and pay attention to how the surrounding elements (e.g. buildings, trees, people) interact with the smoke.
Drawing Smoke in Different Environments
The environment in which smoke is present can have a significant impact on how it looks, so it’s important to consider the setting when drawing smoke. For example, smoke in an outdoor scene will look different than smoke in a crowded room or an industrial setting.
When drawing smoke in different environments, focus on capturing the atmosphere and mood of the setting. For example, if you’re drawing smoke in a dark, ominous industrial setting, you might use dark, heavy shading techniques to create a more foreboding atmosphere.
Incorporating Smoke into Portraits
Smoke can be a powerful creative element in portrait drawing, adding depth, personality, and mood to the piece. However, it’s important to make sure the smoke fits seamlessly with the rest of the drawing.
When drawing a portrait with smoke, focus on capturing the mood and personality of the subject. Use shading and highlighting techniques to create depth and dimension in the smoke, and pay attention to how the smoke interacts with the subject. For example, smoke might echo the subject’s body language or reveal something about their personality or mood.
Conclusion
Drawing smoke can be both challenging and rewarding. By following the steps outlined in this article, using reference images, experimenting with different mediums, and focusing on light and shadow, anyone can create convincing and realistic smoke effects. Remember to practice regularly, and don’t be afraid to experiment with new techniques and ideas.
