Introduction
Dermaplaning is a popular skincare treatment that involves using a small, sterile blade to remove dead skin cells and fine hairs from the face. This non-invasive procedure can improve the texture and appearance of the skin, leaving it smooth, soft, and radiant. While dermaplaning is typically performed by a professional esthetician, it is possible to do it at home with the right tools and guidance. In this article, we’ll explain everything you need to know about dermaplaning at home, including the benefits, techniques, and products you’ll need.
How to Dermaplane at Home
If you’re interested in trying dermaplaning at home, it’s important to be prepared with the right tools and knowledge. Here’s a step-by-step guide to getting the best results:
Step 1: Cleanse Your Face
Start by washing your face with a gentle cleanser to remove any makeup, dirt, or oil. Pat your skin dry with a clean towel.
Step 2: Prep Your Skin
Apply a thin layer of facial oil or moisturizer to help the blade glide smoothly over your skin. Avoid using any heavy creams or lotions that could clog your pores or interfere with the blade.
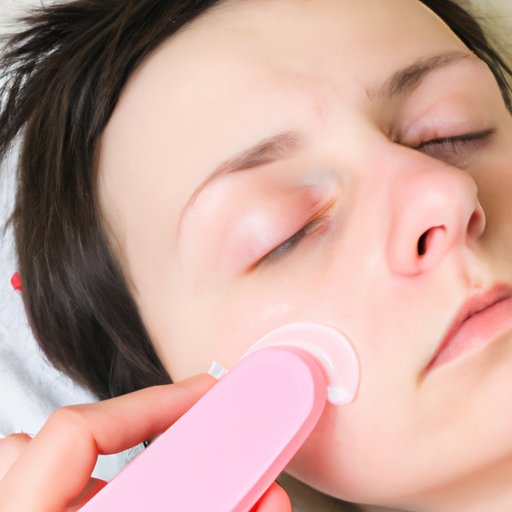
Step 3: Use the Blade
Hold the blade at a 45-degree angle and gently scrape it over your skin, using short, feathering strokes. Start at the top of your face and work your way down, being careful around delicate areas like the eyes and lips. Use light pressure and avoid going over the same area more than once.
Change the blade frequently to ensure that it stays sharp and sanitary. Most blades should be replaced after 3-4 uses.
Step 4: Finish Up
After you’ve finished dermaplaning, rinse your face with cool water and apply your usual skincare products. Avoid using any harsh exfoliants or acids for at least 24 hours, as your skin may be more sensitive than usual.
Tools and Products Needed
To dermaplane at home, you’ll need a few key tools and products:
- A facial razor or dermaplaning tool
- A gentle cleanser
- A facial oil or moisturizer
- A mirror
Tips and Tricks to Avoid Irritation and Injury
While dermaplaning at home is generally safe, there are a few things to keep in mind to avoid irritation or injury:
- Be gentle and use light pressure
- Avoid dermaplaning over active acne, cuts, or wounds
- Avoid dermaplaning more than once a week
- Sanitize your tools before and after each use
Dos and Don’ts of Dermaplaning at Home
When it comes to dermaplaning at home, there are a few dos and don’ts to keep in mind:
Proper Technique
Make sure you use the correct technique when dermaplaning to avoid damaging your skin. Always hold the blade at a 45-degree angle and use light, feathering strokes. Don’t go over the same area more than once, as this can cause irritation.
Frequency of Treatment
It’s best to limit dermaplaning to once a week, as doing it too often can cause irritation or sensitivity.
Importance of Sanitizing Tools
Always sanitize your tools before and after each use to prevent the spread of bacteria and infection. Use rubbing alcohol or another disinfectant to ensure that your tools are clean and safe to use.
Best Tools and Products for Dermaplaning at Home
There are a variety of tools and products available for at-home dermaplaning. Here are a few options:
Facial Razors
Facial razors are a popular choice for at-home dermaplaning, as they are easy to use and relatively inexpensive. Look for a razor with a safety guard to prevent cuts, and make sure the blades are sharp and replaceable.
Dermaplaning Tools
Dermaplaning tools are designed specifically for this purpose and often feature multiple blades, a non-slip handle, and a built-in safety guard. While they may be more costly than razors, they can be a good investment for regular dermaplaning.
Skincare Products
When it comes to skincare products for dermaplaning, choose a gentle cleanser that won’t dry out your skin, and a lightweight facial oil or moisturizer that will absorb easily without clogging your pores.
Features to Look for in a Dermaplaning Kit or Facial Razor
When shopping for a dermaplaning kit or facial razor, look for the following features:
- A safety guard or cover to prevent cuts
- Sharp, replaceable blades
- A non-slip handle for easy use
- Compatibility with various skin types and hair textures
Personal Experience
As someone who has been dermaplaning at home for years, I’ve learned a few tips and tricks along the way. Here are a few things to keep in mind:
Sharing Tips Learned Along The Way
Invest in a good quality dermaplaning tool or facial razor with replaceable blades. This will ensure you get a close shave while minimizing the risk of irritation or cuts.
Before and After Photos
I’ve noticed a significant improvement in the texture and appearance of my skin since starting to dermaplane at home. My skin is smoother, brighter, and more even overall.
Discussion of Skin Improvement Over Time
Consistency is key when it comes to dermaplaning at home. I’ve found that doing it once a week has helped me achieve and maintain the best results. Regular dermaplaning has also helped my skincare products absorb better, which has led to even more skin improvements over time.
Insider Tips From A Professional Esthetician
To achieve medi-spa level results at home, try incorporating these techniques into your dermaplaning routine:
- Use a facial steam or warm towel to open up your pores before dermaplaning
- Apply a gentle chemical exfoliator or serum after dermaplaning to maximize results
- Finish with a hydrating sheet mask to soothe and nourish your skin
Product Recommendations
If you’re looking for professional-grade products to use at home, consider trying these:
- A facial steamer, like the Dr. Dennis Gross Pro Facial Steamer
- A chemical exfoliating serum, like the Sunday Riley Good Genes Lactic Acid Treatment
- A hydrating sheet mask, like the SK-II Facial Treatment Mask
Common Misconceptions About Dermaplaning
There are a few common misconceptions about dermaplaning that may make people hesitant to try it at home. Here are a few things to keep in mind:
Addressing Each Misconception
Dermaplaning will not make your hair grow back thicker or darker. It’s also not dangerous or painful when done correctly. While it may not be suitable for all skin types or conditions, most people can safely dermaplane at home with the right tools and knowledge.
Providing Reassurance That Dermaplaning Is Safe and Effective When Done Correctly
With proper technique, tools, and aftercare, dermaplaning is a safe and effective way to improve the texture and appearance of your skin. If you’re unsure about whether dermaplaning is right for you, consult a professional esthetician or dermatologist for personalized advice.
Conclusion
Dermaplaning at home can be a great way to achieve smooth, glowing skin without spending a fortune on medi-spa treatments. By following our guide and tips, you can safely and effectively dermaplane at home for the best results. Don’t be afraid to experiment with different tools and products to find the ones that work best for your skin type and needs.