I. Introduction
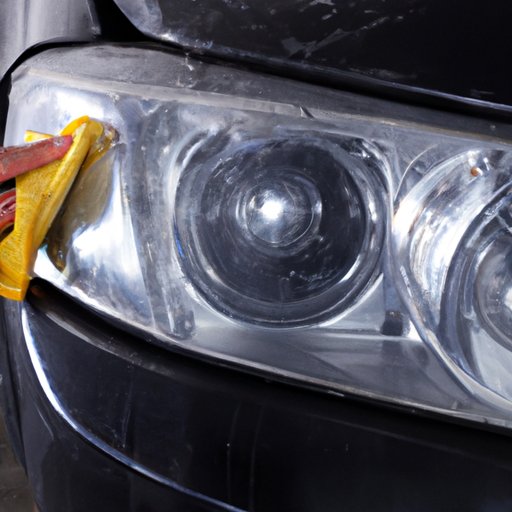
Driving with foggy headlights can be frustrating and, in some cases, dangerous. Not only do they diminish your visibility, but they also detract from the overall appearance of your vehicle. In this article, we will provide you with a comprehensive guide on how to clean foggy headlights and restore them to their former glory. Whether you are a car enthusiast or just looking for a cost-effective solution to your headlight woes, this article is for you. We will cover the causes of foggy headlights, the necessary preparation, different cleaning methods, and post-cleaning maintenance tips.
II. Understanding the Causes of Foggy Headlights
There are many reasons why headlights become foggy or cloudy over time. Some of the common causes include:
- UV radiation from sunlight
- Environmental factors such as acid rain, humidity, and extreme temperature changes
- Chemicals from car washes or abrasive cleaning solutions
- General wear and tear over time
The science behind headlight fogging involves a chemical reaction. Essentially, the outer protective layer of the headlight lens deteriorates, leaving tiny cracks and openings. These exposed areas allow moisture from the air to seep into the headlight and create foggy or cloudy visual results.
III. Preparation
Before beginning any headlight restoration process, you will need to gather some materials and equipment. The necessary items are:
- A Microfiber towel
- A non-abrasive cleaning solution
- Masking tape or newspaper to protect car paint
- 2000-grit sandpaper
- A polishing compound
- A power drill or rotary buffer(optional)
Once you have collected the necessary materials, it is crucial to prepare the headlights and the surrounding areas correctly. Begin by washing the car to remove any dirt or debris from the headlights and the surrounding areas. Then cover the paint with masking tape or newspaper to protect it from scratches during the cleaning process.
IV. Headlight Cleaning Methods
There are different methods to clean foggy headlights. Here are some of the most commonly used techniques explained step-by-step with their pros and cons:
1. Toothpaste Method
Step 1: Apply toothpaste to a clean, dry microfiber towel
Step 2: Rub the toothpaste onto the headlight in a circular motion for 5-10 minutes
Step 3: Wipe off the toothpaste using a clean, damp microfiber towel
Pros: Toothpaste is readily available, cost-effective, and can be used for small cracks and blemishes.
Cons: The toothpaste method requires significant elbow grease and may not remove all the fogginess, especially if the headlight has more severe damage.
2. Sandpaper Method
Step 1: Soak the sandpaper in water for at least one hour
Step 2: Hold the soaked sandpaper against the headlight lens and use gentle, circular motions. Use progressively finer grits, start with a 1000-grit sandpaper, move up to 1500-grit and finish with 2000-grit.
Step 3: Rinse the headlight with clean water and dry with a microfiber towel
Step 4: Apply a polishing compound to a microfiber towel
Step 5: Apply the polishing compound to the headlight lens. Use a power drill or a rotary buffer for the best results if available.
Pros: The sandpaper method is suitable for heavily damaged headlights and removes the oxidation layer, making the headlight clearer.
Cons: Sandpaper can damage the surface if used incorrectly. Also, it takes considerable time and effort to complete the process.
3. Headlight Restoration Kits
Step 1: Tape off surrounding areas with masking tape
Step 2: Apply the headlight restoration kit’s solution to a microfiber towel
Step 3: Wipe the solution directly onto the headlight lens in a circular motion
Step 4: Rinse off the headlight with clean water and dry with a microfiber towel
Step 5: Apply the kit’s sealant to the headlight lens
Pros: Headlight restoration kits offer convenience and are an excellent solution for DIY enthusiasts. They are cost-effective and come with all the necessary tools to perform the job.
Cons: Can be less effective on more severe damage compared to other methods.
V. After Cleaning
Post-cleaning maintenance is crucial to ensure that your headlights remain clear for longer periods. Here are some tips to maintain them properly:
- Keep a regular cleaning schedule for your headlights
- Apply a UV-resistant coating to the headlights to protect against sun damage and oxidation
- For-proper airflow, ensure that the headlight vents are clear and not blocked by debris
- Use a high-quality car wax to provide additional protection against environmental factors
VI. Conclusion
Cleaning foggy headlights can seem like a daunting task at first, but with these methods and tips, you will be able to restore your headlights with ease. Remember to take your time, follow the process correctly and maintain the headlights afterward. By doing so, you will prevent future damage and improve your vehicle’s appearance. Try out these methods, and let us know your success stories in the comments below.
