Introduction
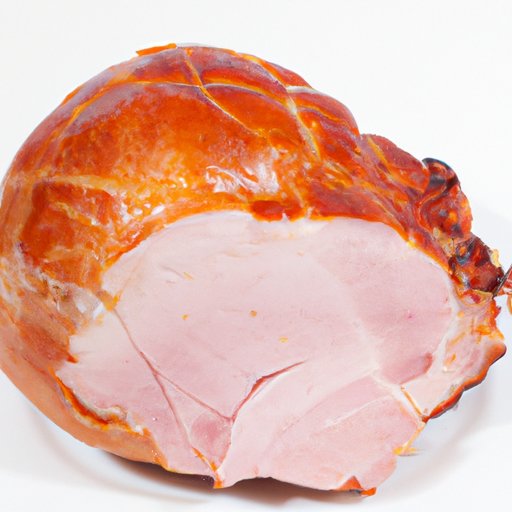
Ham is a delicious addition to any meal, but baking the perfect ham can be a challenge. Choosing the right type of ham, monitoring the temperature, and preparing the right glaze are just a few things that can make all the difference. In this article, we will provide you with a step-by-step guide on how to bake the perfect ham and secrets for creating a moist, tender, and crispy outside.
Step-by-Step Guide: How to Bake the Perfect Ham
The first step to baking the perfect ham is selecting the right type of ham. You can choose between a boneless ham or a bone-in ham. A boneless ham is easier to carve, but a bone-in ham usually has more flavor. Once you have your ham, follow these steps:
1. Preheat your oven to 325°F.
2. Remove any plastic packaging and rinse the ham with cold water.
3. Pat dry with paper towels and place the ham on a roasting pan with the cut side facing down.
4. Cover the meat with aluminum foil, creating a tent-like shape around the ham.
5. Place the ham in the oven on the middle rack.
6. For a bone-in ham, cook for about 15 to 18 minutes per pound. For a boneless ham, cook for 18 to 24 minutes per pound.
7. About 30 minutes before the ham is finished cooking, remove the foil and brush your favorite glaze over the entire ham.
8. Check the temperature of your ham using a meat thermometer. It should read 145°F.
9. Once the ham has reached the desired temperature, remove it from the oven and let it rest for about 15 minutes before carving.
Secrets to a Moist and Tender Ham: Baking Tips and Tricks
Now that you know how to bake a ham, let’s talk about secrets to making it moist and tender. One trick is to score the surface of the ham in a diamond pattern before baking. This helps to create ridges where the glaze can sit, giving the ham more flavor.
Another tip is to add moisture to the ham by placing a small bowl of water in the oven while it’s cooking. This creates steam, which helps to keep the ham moist. Finally, monitoring the temperature is key to achieving a moist and tender ham. Overcooked ham can become dry, so be sure to monitor the temperature using a meat thermometer.
From Glaze to Carving: Everything You Need to Know About Baking a Ham
Now that you’ve perfected baking a ham, let’s talk about everything else you need to know, from preparing the glaze to carving and serving the cooked ham.
How to Prepare a Sweet Glaze and Apply it to the Ham
There are many different types of glazes you can use for your ham, from mustard-based to sweet and fruity. To make a sweet glaze, mix brown sugar, honey, mustard, and pineapple juice in a small bowl. Brush the glaze over the ham in the last 30 minutes of cooking, making sure to cover the entire surface for maximum flavor.
How Carving Techniques Can Affect the Texture and Appearance of the Ham
When carving a ham, it’s important to slice against the grain to ensure that the meat is tender. Starting at the shank end, use an electric or serrated knife to make thin, even slices. Arrange the slices on a serving platter in an overlapping pattern for an attractive presentation.
Tips on Serving and Storing the Baked Ham
A baked ham can be served hot or cold, making it a versatile dish that can be enjoyed in many different ways. Pair it with traditional sides like mashed potatoes, green beans, or macaroni and cheese, or enjoy it on a sandwich with your favorite toppings. Store leftover ham in the refrigerator or freezer for later use.
How to Bake a Ham That’s Crispy on the Outside and Juicy on the Inside
If you want a ham that’s both juicy and crispy, be sure to glaze it generously and often during cooking. The glaze will caramelize and create a crispy texture on the outside, while the meat stays juicy on the inside. Be sure to monitor the temperature and do not overcook the ham to keep it moist and tender.
Hamming It Up in the Kitchen: A Beginner’s Guide to Baking Ham
If you’re new to cooking, baking a ham can seem daunting. Here are some beginner-friendly tips to help you get started:
Choosing the Right Type of Ham for Baking
Choose a boneless ham for easier carving, or a bone-in ham for more flavor.
Basic Tools and Equipment Required for Baking Ham
You’ll need a roasting pan, a meat thermometer, and a basting brush to get started.
Common Mistakes to Avoid While Baking Ham
Avoid overcooking the ham, leaving it uncovered, and using too much salt.
5 Expert-Recommended Techniques for Baking Ham to Perfection
Finally, here are five expert-recommended techniques for baking ham to perfection:
1. Choose a high-quality ham from a trusted source.
2. Use the right glaze and apply it generously.
3. Monitor the temperature using a meat thermometer.
4. Allow the ham to rest before carving.
5. Pair the ham with complementary sides and drinks for a complete meal.
Say ‘Hooray for Ham Day’: Celebrating with a Deliciously Baked Ham
Now that you’ve mastered the art of baking the perfect ham, it’s time to celebrate! Pair it with your favorite sides, like baked mac and cheese, collard greens, or cornbread stuffing, and enjoy with friends and family.
Conclusion
Baking a ham is a delicious and versatile meal that can be enjoyed hot or cold. Follow our step-by-step guide, secrets to moist and tender ham, and expert-recommended techniques to make the perfect ham every time. Don’t be afraid to experiment with different glazes and serving suggestions to create a meal that is truly unique and flavorful.
