Introduction
Chocolate is a sweet treat that has been enjoyed by people for centuries. Whether you are baking a delicious cake or simply want to dip some fruits or cookies into melted chocolate, achieving the perfect texture when melting it can be a bit tricky. That’s why we have created this guide to teach you how to melt chocolate properly.
The Foolproof Guide to Melting Chocolate: A Step-by-Step Tutorial for Beginners
Before we dive into the specifics of chocolate melting, it’s essential to understand why it’s important. Chocolate that is not melted properly can turn clumpy or grainy, making it almost impossible to work with. Melting chocolate correctly ensures that it will be smooth and glossy and blend well with other ingredients. Here’s what you need to know about melting chocolate:
Choosing the right type of chocolate
There are various types of chocolate, including milk chocolate, dark chocolate, and white chocolate, each with different melting points. Dark chocolate with a high cocoa solid content is the most stable when it comes to melting, whereas milk chocolate is more likely to scorch. Choose the right chocolate according to your recipe needs.
Preparing your tools and workspace
Before you begin, ensure that your tools and workspace are clean and free of moisture. Even a tiny drop of water can cause chocolate to seize, creating lumps or clumps that will ruin your chocolate dish.
The basic steps for melting chocolate
The three essential steps for melting chocolate are: chop the chocolate into small pieces, heat it in intervals, and stir frequently. Melt the chocolate slowly and gently, so it doesn’t overheat.
Common mistakes to avoid
Common mistakes while melting chocolate include overheating it, using wet tools, adding water, not stirring it frequently, or leaving the chocolate exposed to water or moisture.

5 Different Techniques for Perfectly Melting Chocolate Every Time
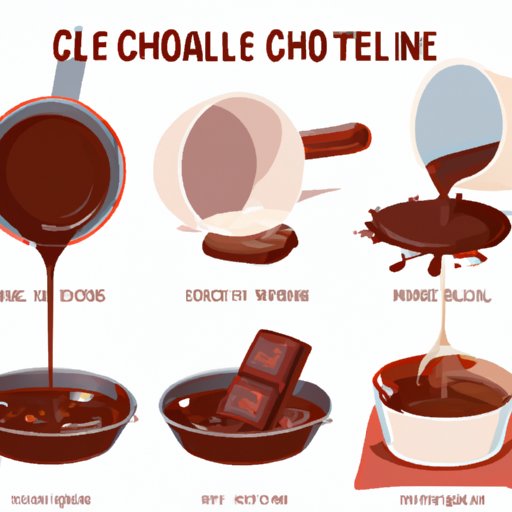
There are different methods for melting chocolate. In this section, we will provide instructions and tips on how to melt chocolate using five distinct methods:
Technique 1: Double boiling method
The double boiling method involves melting chocolate over a bowl of hot water, allowing the steam to slowly warm the chocolate. This technique is one of the most reliable methods for melting chocolate and is ideal for large batches of chocolate or when working on an intricate recipe.
Technique 2: Microwave method
The microwave method is quicker and simpler than some other methods. However, it requires close attention to avoid overheating the chocolate.
Technique 3: Stovetop method
The stovetop method is another option for melting chocolate; it involves heating the chocolate in a pan over low heat while stirring continuously.
Technique 4: Sous-vide method
The sous-vide method is an innovative technique, in which the chocolate is placed in a vacuum-sealed bag and immersed in a temperature-controlled water bath until melted. It provides precise temperature control and can result in perfectly melted chocolate.
Technique 5: Hair dryer method
The hair dryer method is a novel way of melting chocolate that is used to create a glossy finish on chocolate. It involves directing hot air from a hair dryer on to your chocolate to melt it gently.
The Science Behind Melting Chocolate and How to Get It Right
Melting chocolate correctly requires understanding its properties. Here’s what you need to know:
The components of chocolate and how they affect melting
Chocolate is composed of cocoa butter, cocoa solids, sugar, and other ingredients. The main component responsible for the chocolate’s texture when melted is the cocoa butter. The higher the cocoa butter content, the more stable the chocolate during melting.
The importance of temperature control
The temperature of the chocolate is crucial. Overheating the chocolate can cause it to scorch or burn, creating hard lumps that are difficult to dissolve. Avoid using high heat to melt chocolate; always use lower heat settings.
The role of water and moisture in melting chocolate
Even a small amount of moisture can cause chocolate to seize or become lumpy. Always work in a dry environment and avoid adding moisture to the chocolate, including steam from water or even condensation on the utensils.
Factors that can cause chocolate to seize or become lumpy
If the chocolate is overheated or there is moisture in the chocolate, it can quickly seize, turning it lumpy and unusable. Always avoid exposing the chocolate to water, which can cause it to seize.
Melting Chocolate in the Microwave: Quick and Simple Method
Step-by-step instructions for melting chocolate in the microwave
Here are the steps for using the microwave method:
- Chop the chocolate into small pieces
- Place the chopped chocolate into a microwave-safe dish
- Heat the chocolate in the microwave for 20 seconds
- Remove and stir the chocolate
- Return the chocolate to the microwave and heat at 10-second intervals, stirring at each interval until melted
Tips for avoiding burnt spots or uneven melting
Always stir the chocolate every time it’s removed from the microwave. This ensures that the chocolate is evenly heated, without any hot spots. Avoid overheating, as this can burn the chocolate.
Pros and cons of using this method
The microwave method is ideal for smaller batches of chocolate, simple recipes, and when you require quick results. However, it requires close attention, as chocolate can overheat quickly in the microwave, which can cause lumps or even burnt spots.
Double Boiling Method: How to Melt Chocolate Like a Pro
Explanation of the double boiling method
The double boiling technique involves creating a double boiler by placing a heatproof bowl over a pot of hot water. It’s a gentle and slow method for melting chocolate, perfect for delicate chocolate work, and when you need precise temperature control.
Step-by-step instructions and tips for using this method
- Chop the chocolate into small pieces.
- Heat water in a saucepan and bring to a simmer.
- Place a heatproof bowl over the pot, ensuring the bottom of the bowl does not touch the water.
- Add the chocolate to the bowl and stir gently and continuously until it’s melted.
- Remove the bowl from the heat and wipe the bottom with a dry towel before pouring the melted chocolate into containers or using it in your recipe.
Pros and cons of using this method
The double boiling method is ideal for melting chocolate slowly and gently, providing precise temperature control, and ensuring a smooth, glossy finish. However, it requires a bit more time and attention than some other methods.
Tips and Tricks for Melting White Chocolate without Burning It
Why white chocolate requires special attention
White chocolate has a lower melting point than other chocolates and is more susceptible to overheating. In addition, it has additional ingredients such as milk solids and sugar that can contribute to scorching.
Common mistakes to avoid
White chocolate is more prone to seizing, so avoid adding liquid or moisture to the chocolate. In addition, avoid overheating or using high heat settings when melting white chocolate.
Techniques for melting white chocolate without burning it
You can melt white chocolate using any of the methods detailed in this guide, but it’s crucial to take it slow and avoid overheating. You can also add shortening to help stabilize the chocolate, but be careful not to add too much.
From Scratch to Glossy: How to Melt Chocolate Chips for Delicious Desserts
The benefits of using chocolate chips for baking and desserts
Chocolate chips are an excellent option for baking and desserts as they’re easy to customize, melt quickly, and are available in different flavors.
How to melt chocolate chips
- Chop the chocolate chips into small pieces.
- Heat the chocolate chips in a microwave-safe bowl, heating them at intervals of 10 seconds until melted.
- Stir the chocolate thoroughly between intervals, to ensure that there are no lumps.
Tips for creating a smooth, glossy finish
To create a smooth and glossy finish, avoid heating the chocolate too quickly, stirring it frequently, and avoiding exposing it to water or moisture. Adding shortening or butter can also create a silkier texture and a glossy shine.
Conclusion
Melting chocolate can seem like a daunting task, but with the right tools and techniques, you’ll be able to achieve perfect results every time. From choosing the right chocolate type and preparing your workspace, to understanding the science behind chocolate melting, we’ve covered everything you need to melt chocolate like a pro. Avoiding common mistakes while melting chocolate and taking care to use the appropriate melting techniques can help you create the perfect chocolate recipe, every time.
